How to Fix Background Noise in Online Meetings
Stop sounding like you're in a tin can. Learn my personal steps to clean audio, from cheap acoustic hacks to AI noise cancellation that actually works.
Main Highlights Regarding Crystal Clear Audio for Online Meetings
Acoustic Treatment is King: No software can fix a truly noisy room; physical barriers and sound absorption are crucial.
Microphone Matters: The right microphone for your environment makes a world of difference.
Software Enhancements are Powerful: Tools like NVIDIA Broadcast or Krisp can dramatically improve sound quality.
Practice and Testing: Always test your setup before a live call.
Like many of you, I used to dread online meetings. It wasn't the content, but the constant battle with terrible audio. My voice would echo, background noise from my kids playing or the dog barking would bleed through, and sometimes, my mic would just sound like I was talking from inside a tin can. I've been on the receiving end of countless "Can you repeat that?" and "You're breaking up," and frankly, it was exhausting and unprofessional. I knew there had to be a better way than just shouting into my laptop's built in microphone. This frustration became my motivation to overhaul my entire audio setup, and what I learned transformed my online presence. This isn't just about sounding good; it's about being understood, connecting effectively, and reducing the stress of virtual communication. This guide is a distillation of my own trial and error, successes, and a few embarrassing failures.
My Personal Audio Odyssey: From Muffled to Magnificent
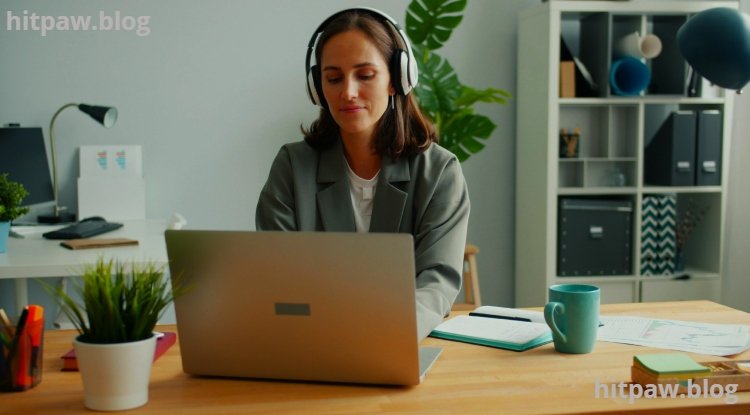
My journey started during the peak of remote work. Suddenly, my home office, which was essentially a spare bedroom with hard walls and minimal furnishings, became my primary communication hub. My first few months were a disaster. Imagine trying to lead a team meeting while your neighbor decides it’s the perfect time to mow their lawn, or your partner starts a blender in the kitchen. My cheap headset mic wasn't cutting it, and built in laptop microphones were even worse. I felt unheard, and my contributions were often lost in the audio chaos. That's when I decided to get serious. I started researching, buying gadgets, testing software, and slowly but surely, I pieced together a setup that now gives me consistently clear audio, no matter what's happening around me. My aim was to achieve broadcast quality sound without breaking the bank or turning my office into a recording studio. And I believe I've cracked the code for practical, effective audio cleaning for anyone working remotely.
Materials: My Go To Gear for Crystal Clear Sound
Achieving great audio isn't just about one magical piece of equipment; it's about a combination of hardware and software working in harmony. Here’s what I personally use and recommend, along with some alternatives I've tested.
Microphones (The Foundation):
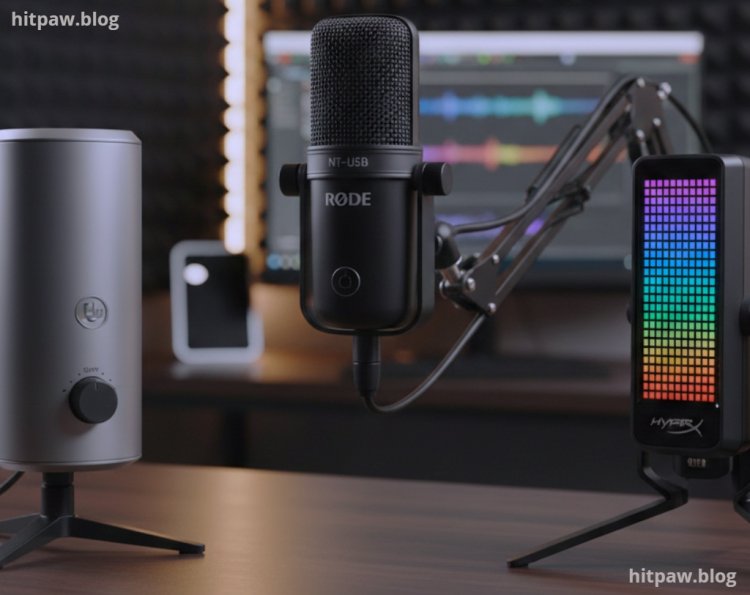
Rode NT-USB Mini: This is my current daily driver. I chose it because it's a condenser microphone, meaning it picks up a lot of detail, but its cardioid polar pattern focuses on my voice directly in front of it, rejecting a lot of side and rear noise. Its USB-C connectivity means it's plug and play, which is fantastic.
Blue Yeti USB Microphone (Alternative): I started with a Blue Yeti, which is also excellent, especially for its versatility with multiple polar patterns (cardioid, omni, stereo, bidirectional). I used the cardioid setting almost exclusively for meetings. It’s slightly larger than the Rode but very robust.
HyperX QuadCast S (Gaming Headset Mic Upgrade): If you're coming from a gaming headset, a dedicated USB mic like the Rode or Yeti is a huge leap. However, if you prefer the convenience of an all in one headset, the HyperX QuadCast S (while technically a standalone mic, it often appeals to gamers) has a surprisingly good cardioid mic for its price point. I also briefly used a Sennheiser PC 8 USB headset, which was an improvement over generic ones.
Acoustic Treatment (The Unsung Hero):
Foam Acoustic Panels (SoundAssured, Auralex): I bought a pack of 12inch by 12inch wedge style acoustic foam panels. These aren't sound proofing but sound absorption. I strategically placed them on the walls behind my monitor, and a few on the wall directly opposite me. I opted for charcoal grey to blend in. You can find these cheaply on Amazon.
Portable Vocal Booth / Reflection Filter (Neewer): This was a game changer. It's a curved metal and foam shield that sits behind my microphone. It significantly reduces room echo and helps create a drier, more focused sound for my voice. I found a great Neewer brand one that clamps to my mic stand.
Thick Rug/Carpet: My office initially had bare hardwood floors. Adding a thick, shaggy rug under my desk and chair immediately deadened a lot of unwanted reflections.
Heavy Curtains/Drapes: Replacing thin blinds with heavy, lined curtains on my window provided another layer of sound absorption and blocked external noise.
Bookshelves Filled with Books: This is an accidental but effective acoustic treatment! My packed bookshelves act as excellent diffusers and absorbers.
Software Solutions (The Smart Enhancers):
NVIDIA Broadcast App: If you have an NVIDIA RTX graphics card (which I do, an RTX 3070), this is a must have. Its AI powered noise removal is nothing short of miraculous. It can completely eliminate keyboard clicks, fan noise, dog barks, and even loud construction sounds while preserving your voice. I route my Rode NT-USB Mini through NVIDIA Broadcast.
Krisp.ai: Before I got an RTX card, Krisp was my go to. It's a fantastic AI powered noise cancellation app that works with any microphone and operating system. It works wonders for both outgoing and incoming audio. It does have a paid subscription, but the free tier offers limited minutes.
Voicemeeter Banana (Advanced Mixer): For more complex setups, Voicemeeter Banana allows you to route audio, mix multiple inputs, and apply EQ. It has a steeper learning curve, but it's incredibly powerful for fine tuning. I used this initially to combine my microphone with other audio sources and apply some basic noise gates.
Audacity (Free Audio Editor): While not for real time processing, Audacity is invaluable for analyzing test recordings, identifying problem frequencies, and practicing post processing techniques.
Accessories (The Small but Mighty Details):
Pop Filter (Stedman Proscreen 101): Essential for any condenser mic. It eliminates plosives (the harsh "p" and "b" sounds that can make your audio "pop"). I used a Stedman Proscreen 101, which is a metal screen type I find them more durable and effective than foam ones.
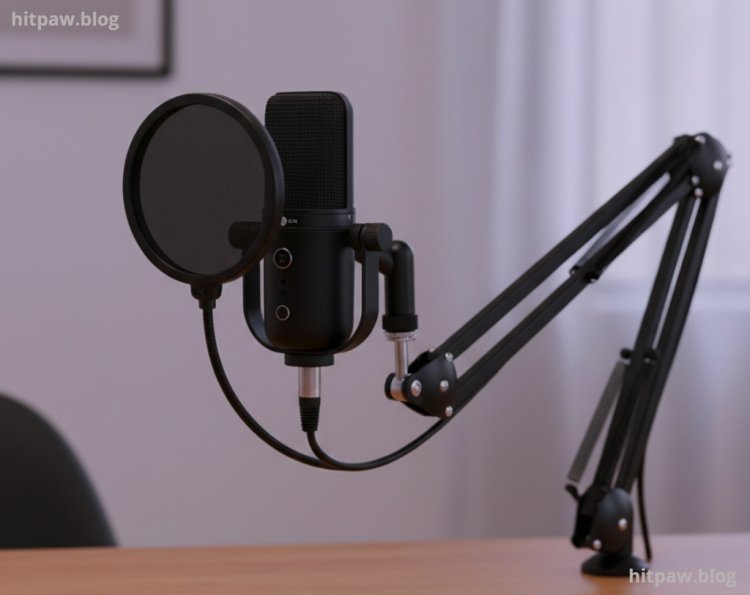
Desk Mount Boom Arm (Rode PSA1+): Getting the microphone closer to your mouth (about 4 to 6 inches away) is paramount. A boom arm keeps it out of the way but perfectly positioned. I upgraded to a Rode PSA1+, which is smooth and silent.
Shock Mount (Rode PSM1): Reduces vibrations transmitted through your desk (e.g., typing, bumping the table) from reaching the microphone. My Rode NT-USB Mini came with a small desk stand, but the shock mount combined with the boom arm made a huge difference.
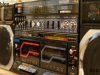
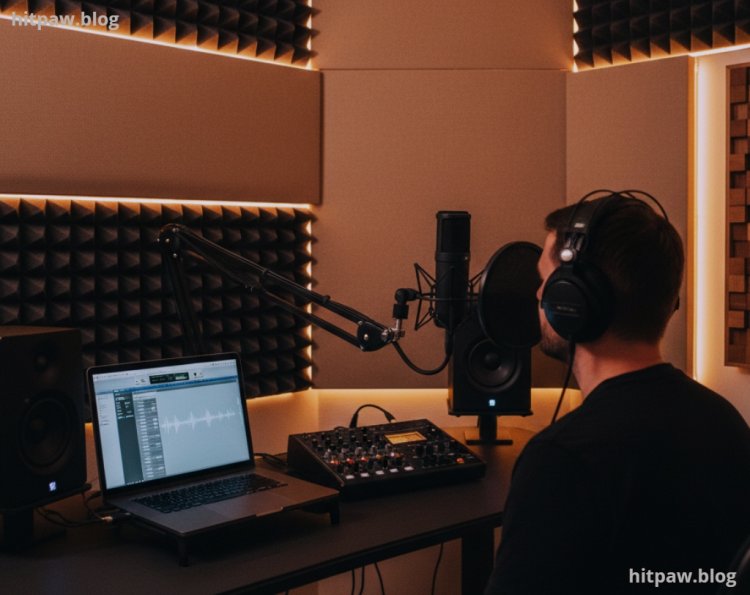
Here's an image of my current microphone setup with the boom arm and pop filter.
Step by Step Guide: My Process for Achieving Clean Audio
This is the exact sequence I followed to transform my audio from passable to pristine. Don't feel you have to do everything at once; even one or two steps can make a massive difference.
Step 1: Assess Your Environment and Identify Noise Sources
Before buying anything, I took stock of my room. I recorded myself speaking for a few minutes using my laptop's built in mic and then listened back carefully.
Room Echo/Reverb: My bare walls and hardwood floors created a lot of echo. This sounds like you're in a bathroom or an empty hall.
External Noise: Traffic, lawnmowers, neighbor's dog, construction.
Internal Noise: Computer fan, air conditioner, keyboard clicks, mouse clicks, chair squeaks, kids/pets in other rooms.
This assessment helped me prioritize what I needed to tackle first. My biggest culprits were room echo and my loud keyboard.
Step 2: Start with Basic Acoustic Treatment (Absorb & Isolate)
This is the most impactful step you can take. Software can only do so much if your room is an echo chamber.
Add Soft Furnishings: I started by placing a thick area rug under my desk. This immediately reduced floor reflections. I also hung heavy curtains on my window.
Strategic Panel Placement: I bought a pack of acoustic foam panels. Instead of covering every wall (which isn't necessary for speech), I focused on the "first reflection points."
I sat in my chair and had someone hold a mirror against the wall. Where I could see my monitor in the mirror, that's a first reflection point. I placed panels there, usually behind my monitor and on the side walls.
I also placed some panels on the wall directly behind me.
Create a "Dead Zone" with a Reflection Filter: For a more focused sound, I set up my portable reflection filter behind my microphone. This creates a mini booth effect.
Close Doors & Windows: Seems obvious, but it's often overlooked. Minimizing external noise sources manually is always the first line of defense.
Here's an example of how I strategically placed some acoustic panels.
Step 3: Choose the Right Microphone and Position It Correctly
This is where many people go wrong. A good mic makes a world of difference.
Dedicated USB Microphone: I chose the Rode NT-USB Mini. Its cardioid pattern is ideal for focusing on my voice and rejecting room noise.
Boom Arm & Pop Filter: I mounted my mic on a boom arm to get it about 4 to 6 inches from my mouth, slightly to the side to avoid breathing noises. I always use a pop filter to prevent plosives.
Shock Mount: To isolate the mic from desk vibrations, I installed a shock mount. This is crucial if you type while speaking.
Step 4: Implement Software Noise Reduction
Once your physical environment and microphone are optimized, software can handle the rest.
NVIDIA Broadcast (RTX Owners): If you have an RTX card, download and install NVIDIA Broadcast.
Open the app.
Go to the "Microphone" tab.
Select your physical microphone (e.g., "Rode NT-USB Mini") as the input device.
Enable the "Noise Removal" effect.
Adjust the strength slider. I usually keep mine between 70 to 85% for a natural sound.
In your meeting software (Zoom, Teams, Google Meet), select "NVIDIA Broadcast (Rode NT-USB Mini)" as your microphone input.
Krisp.ai (General Use): If you don't have an RTX card, download Krisp.
Install the app.
In Krisp, select your physical microphone as the input and enable "Remove Noise."
In your meeting software, select "Krisp Microphone" as your input.
Built in Meeting Software Options: Most platforms (Zoom, Teams) have their own noise suppression. While not as powerful as NVIDIA Broadcast or Krisp, they can still help. I usually enable them in addition to my dedicated software for an extra layer, but if you're only using one, prioritize the dedicated app.
Step 5: Test, Test, Test!
Never go into a live meeting without testing your setup.
Use the "Test Mic" Feature: Most meeting apps have a "test speaker and microphone" option in their audio settings.
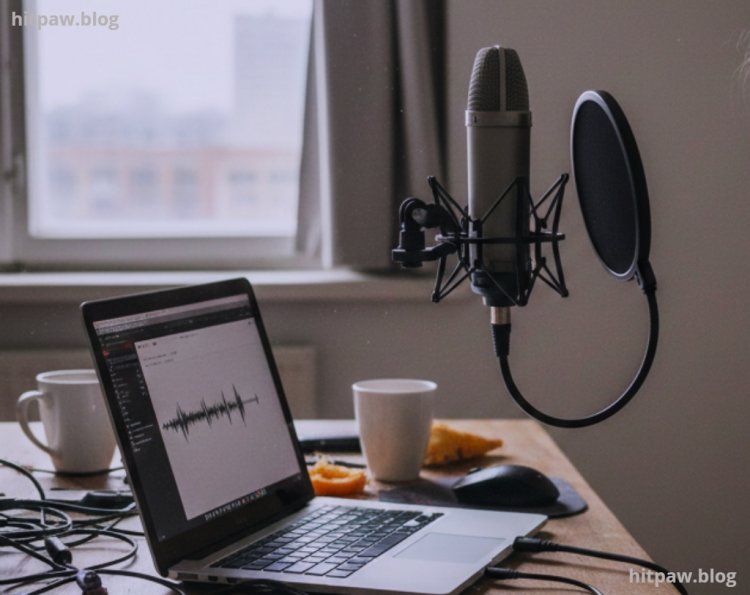
Record Yourself: Use Audacity or your computer's built in sound recorder to record a few minutes of yourself speaking, including typical background noises (typing, a door closing). Listen back critically.
Get Feedback: Do a quick call with a friend or colleague and ask them for honest feedback on your audio quality.
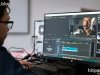
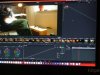
Here’s a shot of my NVIDIA Broadcast settings, which I fine tune before every important call.
What I Got Wrong the First Time
My first attempt at improving my audio was, shall we say, less than stellar. I made a classic mistake: I thought buying the most expensive microphone would solve all my problems. I got a fantastic condenser microphone, but I plugged it directly into my laptop in my untreated, echoey room. The result? A very clear recording of my voice, yes, but also a very clear recording of my room's reverb, the hum of my computer fan, and every click of my mechanical keyboard. It sounded clinical, but also hollow and noisy. I was disheartened.
The Lesson: I learned that a good microphone amplifies whatever it hears. If your room is noisy, an expensive, sensitive mic will just amplify that noise. The fix was to go back to basics: acoustic treatment first, then microphone, then software. I invested in those cheap acoustic foam panels and the portable reflection filter, and the difference was night and day before I even touched any software. It taught me that physical environment control is paramount; software is there to polish, not to fix fundamental issues.
Another mistake was ignoring the pop filter. My first recordings were full of harsh "p" and "b" sounds that were really distracting. A simple $15 pop filter instantly fixed that, showing me that sometimes the simplest, cheapest accessories make the biggest difference.
Final Advice: It's an Investment in Your Professional Self
Achieving consistently clear audio for online meetings was one of the best investments I made in my professional life. It reduced my stress, improved my communication, and honestly, made me feel more confident during calls. You don't need a professional studio, but a few smart choices in hardware and software can elevate your presence dramatically. Start with one thing maybe just a better microphone or some acoustic panels and build from there. The feedback I've received from colleagues has been overwhelmingly positive. No more "what was that?" just clear, effective communication. Your voice is your primary tool in virtual meetings; make sure it's heard clearly.
Related Frequently Asked Questions
Q1: Do I really need acoustic treatment? Can't software fix everything?
A1: While software like NVIDIA Broadcast or Krisp is incredibly powerful for noise removal, it cannot truly fix room echo or reverb. Acoustic treatment (like foam panels, heavy curtains, rugs, or even just strategically placed furniture and bookshelves) absorbs sound waves, preventing them from bouncing around and creating that hollow, distant sound. Software can make your voice clearer, but if your room sounds like a bathroom, your voice will still carry that room's sonic signature. I've found that addressing the room first makes the software much more effective and results in a far more natural sounding audio. Think of acoustic treatment as preparing a clean canvas for your sound.
Q2: What's the difference between a condenser mic and a dynamic mic for online meetings? Which is better?
A2: Condenser microphones are generally more sensitive and capture a wider frequency range, making them great for picking up detailed nuances of your voice. They often sound "clearer" and more "hi-fi." However, their sensitivity also means they pick up more background noise and room ambiance. Dynamic microphones are less sensitive, more robust, and excel at isolating the sound directly in front of them, making them great in noisy environments. For online meetings in a typical home office, a cardioid condenser microphone (like the Rode NT-USB Mini or Blue Yeti in cardioid mode) is often a good balance. It provides clarity without being overly susceptible to surrounding noise, especially when paired with good mic placement and software noise reduction. If your environment is extremely noisy and untreated, a dynamic mic might be a safer bet initially, but you might sacrifice some voice detail.
Q3: My computer fan is very loud. How can I reduce its noise from being picked up?
A3: This is a common problem! First, try to physically minimize the noise: ensure your computer's vents are clean and unobstructed, and consider a laptop stand for better airflow. For noise pickup by your microphone, here's what I recommend:
Microphone Placement: Get your microphone as close to your mouth as possible (4 to 6 inches) and angle it slightly away from the computer. This ensures your voice is much louder at the mic than the fan, making it easier for noise reduction software to distinguish.
Cardioid Polar Pattern: Use a microphone with a cardioid pattern, which rejects sound from the sides and rear. Position the fan in the "null" (the area of least sensitivity) of the microphone.
Software Noise Reduction: This is where NVIDIA Broadcast or Krisp.ai truly shine. They are designed to specifically filter out constant, non vocal background noises like fan hums, often with remarkable effectiveness, making your fan virtually inaudible to others.
Q4: Should I use headphones or speakers during a meeting?
A4: Always use headphones for online meetings if possible. Using speakers creates a phenomenon called "feedback loop" where your microphone picks up the audio coming out of your speakers, sends it back to the meeting, and then picks it up again, causing echo for everyone else. Even if your meeting software has echo cancellation, it's never perfect. Headphones (even basic earbuds) isolate the incoming audio, preventing it from bleeding into your microphone and ensuring clearer sound for all participants. I personally use closed back over ear headphones to further isolate myself from external distractions.
Q5: My voice sounds "thin" or "muffled." How can I fix that?
A5: This usually points to a few common issues:
Microphone Quality/Proximity: If you're using a laptop's built in mic or a cheap headset, the quality simply might not be there. Upgrade to a dedicated USB microphone. Also, ensure your microphone is close enough to your mouth. If it's too far away, it will sound distant and thin.
Room Acoustics: A very echoey room can make your voice sound distant and less "full." Revisit acoustic treatment.
Gain Settings: Your microphone's gain (input volume) might be too low. Check your operating system's sound settings and your microphone's physical gain dial (if it has one). Too low, and you'll sound faint; too high, and you'll distort. Aim for a healthy signal that peaks in the green without consistently going into the red.
Pop Filter Misuse: Sometimes, a foam pop filter placed too close to the mic can actually muffle your voice. Try using a metal mesh pop filter or positioning the foam one slightly further away.
EQ (Advanced): If you're comfortable with advanced settings (e.g., in Voicemeeter Banana), you could apply a subtle EQ boost in the lower mid frequencies (around 100 to 250 Hz) to add warmth and fullness, and a slight cut in the muddy mid range (300 to 500 Hz). However, start with the simpler solutions first.
What's Your Reaction?