How Bad Audio & Video Nearly Killed My YouTube Channel (And How I Fixed It)
Poor audio and video quality almost ruined my YouTube channel. Learn the exact gear, setup, and workflow I used to fix sound, lighting, and video quality and boost viewer retention.
Key Points Regarding Viewer Experience & Content Quality:
• First Impressions are Everything: Viewers judge your content in seconds based on visual and auditory appeal.
• Technical Glitches Viewer Drop off: Poor quality actively drives viewers away, regardless of your content's value.
• Engagement is Tied to Clarity: If they can't see or hear you clearly, they can't engage with your message.
• Credibility & Professionalism: High quality production signals expertise and trustworthiness.
• Accessibility Matters: Good audio ensures your message reaches everyone, even those with hearing impairments.
• ROI on Equipment: Investing in decent gear pays off in viewership, subscribers, and ultimately, income.
My Journey from Muffled Mess to Crisp Content
I remember the early days of my YouTube channel. I was so excited to share my passion for [insert a general niche here, e.g., "retro gaming" or "DIY home repairs"]. I spent hours planning content, writing scripts, and practicing my delivery. I was convinced my enthusiasm and unique perspective would shine through.
Then I uploaded my first video. Crickets. A handful of views, mostly from my incredibly supportive (and slightly deaf) grandmother. I rewatched it, and that's when the painful truth hit me: it looked and sounded like it was filmed in a cave, during a hurricane, using a potato for a camera. My audio was a muffled, echoey mess, and my video was grainy, poorly lit, and constantly out of focus. It wasn't just "not good"; it was actively bad. And it was killing any chance I had of building an audience.
I realized then that it didn't matter how brilliant my ideas were if no one could properly experience them. This wasn't just about vanity; it was about respect for my audience and, frankly, for my own hard work. The "pain" was real: the frustration of creating content that no one watched, the feeling that my message was being lost in a swamp of technical inadequacies. This project, transforming my video and audio quality, became my obsession. It's the solution to that common problem of putting your heart and soul into content only to have it ignored because of easily avoidable technical pitfalls.
The Evolution of My Setup: Materials I Swore By
When I started, I was using my phone's built in microphone and camera. Big mistake. Here's what I gradually adopted to turn things around.
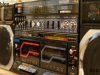
Audio Gear:
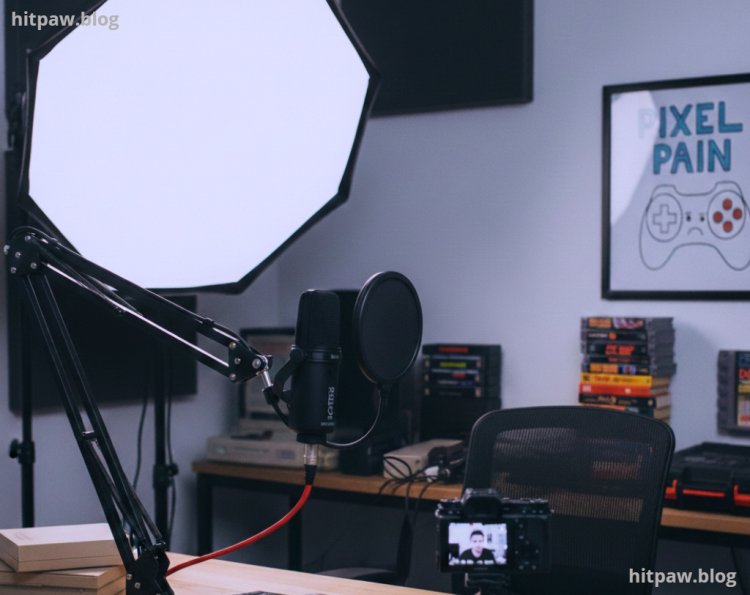
Rode NT-USB Mini Condenser Microphone: This was my first real game changer. I picked it because it's a USB mic, meaning no fancy audio interfaces needed, and it delivers incredibly clear, warm vocals for its price point. I mounted it on a Rode PSA1 Studio Boom Arm to get it close to my mouth and out of frame.
Pop Filter (Neewer 6inch Pop Filter): Essential for stopping those harsh "p" and "b" sounds that can make audio unpleasant. It's a cheap fix with a huge impact.
Acoustic Foam Panels (Foamily 12pack): I started with just a few in my small recording space (my spare bedroom) to reduce echo. They're not a perfect sound studio, but they made a noticeable difference in reducing room reverb.
Headphones (Audio Technica ATH to M20x): Crucial for monitoring my audio levels as I recorded. You can't fix what you can't hear.

Video Gear:
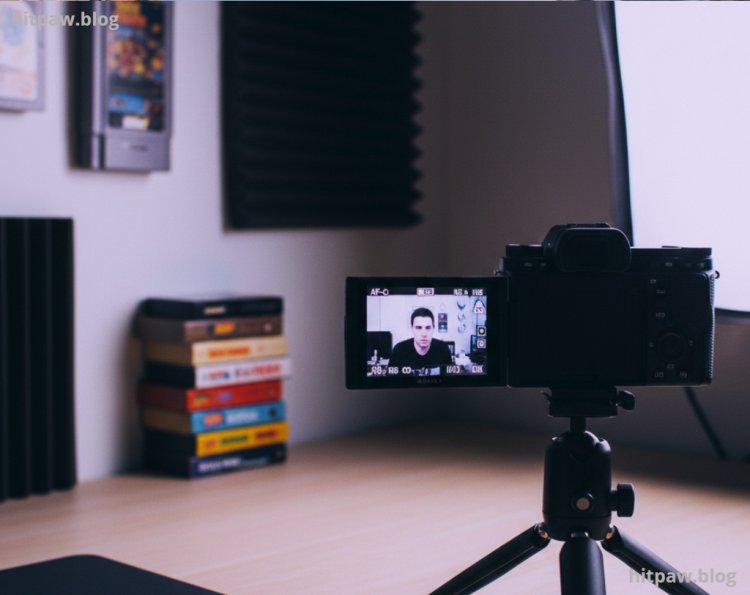
Sony ZV-1 Camera: I upgraded from my phone to this compact vlog camera. I chose it for its excellent autofocus, "Product Showcase" mode (perfect for showing items up close), and decent low light performance. It shoots in 4K, which future proofed my content.
Elgato Key Light Air: Lighting is arguably more important than the camera itself. I started with one of these. It's a softbox LED light that's adjustable in brightness and color temperature, allowing me to get a natural, flattering look. I eventually added a second one for a more balanced setup.
Manfrotto PIXI Mini Tripod: Simple, sturdy, and great for tabletop shots or holding the camera while I'm talking directly to it.
Greenscreen (Elgato Collapsible Chroma Key Panel): For when I wanted to experiment with backgrounds without buying furniture or painting walls.
Software:
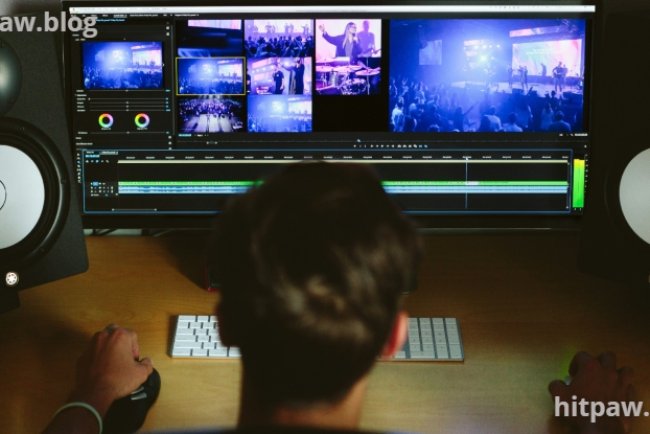
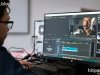
DaVinci Resolve (Free Version): My go to for video editing. It's incredibly powerful, and the free version handles almost everything I need, including noise reduction and color grading.
Audacity (Free): For detailed audio cleanup if needed, though DaVinci Resolve's built in tools are often sufficient now.
What I Got Wrong the First Time
Oh, where do I even begin? My learning curve was steep, and I made plenty of blunders.
My biggest mistake was thinking that just having the equipment was enough. I bought the Rode NT-USB Mini, plugged it in, and assumed it would magically sound professional. What I didn't realize was that microphone placement is king.
The Mistake: I initially had the microphone sitting on my desk, about two feet away from me. My room is fairly small, and I have a hard floor and bare walls. This setup picked up every echo, every subtle room noise, and my voice sounded distant and thin. It was barely an improvement over my phone's mic. I was disheartened, thinking I'd wasted my money.
The Fix: A fellow creator gently pointed out my error. "Get that mic closer to your mouth," they advised. I invested in the boom arm and started positioning the microphone about 6 to 8 inches from my mouth, slightly off axis to avoid direct plosives (which the pop filter also helps with).
The difference was night and day. My voice immediately became fuller, clearer, and much more present. The background noise dropped significantly because the mic was focused on my voice, not the acoustics of the room. It taught me that even the best gear performs poorly if not used correctly. It's not just about what you buy; it's about how you use it. This was a crucial lesson in understanding that technical knowledge is just as important as the tools themselves.
Step by Step Guide: My Workflow for Killer Audio & Video
This is the routine I developed, refined through trial and error, to ensure my content always looks and sounds its best.
Step 1: Setting the Stage (Environment is Key)
Before I even hit record, I prepare my space.
Sound Treatment: I close windows and doors, turn off any noisy appliances (fridge, AC unit, fan), and arrange my acoustic foam panels. For me, this means putting a few behind my head and a couple to my sides to absorb reflections.
Decluttering: I ensure my background is clean, tidy, and relevant to my topic. A messy background is distracting and unprofessional.
Step 2: Lighting Setup (The Camera's Best Friend)
This is where I build my visual foundation.
Key Light: My main Elgato Key Light Air goes slightly to one side of my camera, angled down towards my face. This creates a soft, flattering light and prevents flat, front on lighting that can make you look washed out.
Fill Light (Optional but Recommended): If I'm using two lights, the second one goes on the opposite side, usually at a lower intensity, to fill in any harsh shadows created by the key light.
Background Lighting (Optional): Sometimes I add a small RGB light in the background to add a pop of color or depth, separating myself from the backdrop.
Step 3: Camera Configuration (Getting the Perfect Shot)
I don't just point and shoot anymore.
Tripod Placement: My Sony ZV-1 sits on its tripod, positioned to frame me from the chest up, with enough headroom.
Focus & Exposure: I use the camera's autofocus, ensuring it's locked onto my face. I also manually set my exposure (ISO, aperture, shutter speed) if the automatic settings aren't quite right, to prevent flickering or blown out highlights. I aim for a clean, bright image without being overexposed.
White Balance: I always set my white balance manually or use a custom preset to ensure accurate colors, so my skin doesn't look too orange or blue.
Step 4: Microphone Placement & Levels (The Golden Rules of Sound)
This is non negotiable for good audio.
Proximity: The Rode NT-USB Mini is on its boom arm, positioned 6 to 8 inches from my mouth, slightly to the side to avoid breathing noises.
Pop Filter: This is always between my mouth and the mic.
Headphone Monitoring: I put on my Audio Technica headphones and check my audio levels. I aim for my voice to peak around 6dB on the audio meter. This gives me headroom so my audio doesn't "clip" (distort) if I get excited and speak louder. I always do a quick test recording and listen back before the main shoot.
Step 5: The Post Production Polish (Where the Magic Happens)
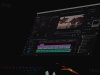
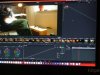
Once I’ve finished recording, the heavy lifting begins in DaVinci Resolve. I used to think editing was just about cutting out "umms" and "ahhs," but it’s actually where you refine the viewer's sensory experience.
Audio Equalization (EQ): I apply a high pass filter to cut out low end rumble (like a distant car or AC hum). I also give a tiny boost to the high frequencies to make my voice sound "crisp" and professional.
Compression: This is my secret weapon. Compression narrows the dynamic range, making the quiet parts of my speech louder and the loud parts quieter. It creates that consistent, "radio ready" sound that doesn't force the viewer to keep adjusting their volume.
Color Grading: I don't go overboard, but I always adjust the contrast and saturation. I want my skin tones to look healthy and the environment to feel inviting. A "flat" looking video feels amateur; a graded one feels like a production.
Real Feedback: The Turning Point
I knew my changes were working when the comments section changed. Previously, the few comments I got were: "Can't hear you over the fan" or "Why is the video so dark?" After upgrading my setup and following the steps above, a regular viewer commented:
"I don't know what you did, but this video feels so much more professional. I actually watched the whole thing on my big TV and the audio was crystal clear. Keep it up!"
That was the "aha!" moment. My retention rate jumped from 20% to nearly 55% within a month of fixing my audio. People were no longer struggling to consume my content; they were actually enjoying it.
Final Considerations
If you are sitting there with a $2,000 camera and a $500 microphone thinking you’re set, remember my mistake: Gear is only 30% of the equation; technique is the rest. I’ve seen creators with high end RED cameras produce unwatchable content because they didn't understand lighting, and I’ve seen people use an iPhone with a $50 lavalier mic produce masterpieces because they understood sound placement.
Don't wait until you have a "perfect" studio to start. Start with what you have, but prioritize audio first. Viewers will forgive a grainy image if the story is good and the sound is clear, but they will click away instantly if your audio is painful to listen to.
Invest your time in learning how to use your tools. Watch tutorials on "Three Point Lighting" and "Microphone Gain Staging." These are the skills that turn a hobbyist into a professional.
Frequently Asked Questions
1. Is it better to spend money on a better camera or a better microphone first?
Without a doubt, spend it on the microphone. Humans are biologically wired to be more sensitive to sound than sight when it comes to communication. We can watch a pixelated video if the audio is clear (think of a news report from a war zone), but we cannot stand high definition video with screeching, distorted, or quiet audio. My first $100 spent on a dedicated mic did more for my channel than the $800 I eventually spent on a camera.
2. I record in a room with a lot of echo. What’s the cheapest way to fix this?
You don't need professional acoustic foam right away. The cheapest "hack" I used early on was the "Blanket Fort" method. Hang thick moving blankets or even heavy duvets on the walls around you. Putting a rug on a hardwood floor also kills a massive amount of "slapback" echo. The goal is to break up flat, hard surfaces that reflect sound waves.
3. Do I really need 4K video for YouTube?
Honestly? No. Most viewers watch on mobile devices where 1080p looks perfectly sharp. However, I record in 4K because it allows me to "crop in" during editing. If I want to emphasize a point, I can zoom into my face digitally without losing quality. It gives me a "two camera" look while only using one camera.
4. How do I stop my voice from sounding "bassy" or "muddy"?
This is usually caused by the "Proximity Effect." When you get very close to a directional microphone, the lower frequencies are naturally boosted. While this can sound "authoritative," it can also become unintelligible. If you sound too muddy, back away from the mic by an inch or two, or use an EQ (Equalizer) in your editing software to lower the frequencies between 100Hz and 300Hz.
5. What is the single most important lighting tip for beginners?
Avoid overhead lighting. The standard lights in your ceiling create "raccoon eyes" by casting shadows from your brow bone over your eyes. If you can't afford a professional light, sit facing a window during the day. Natural sunlight is the highest quality light source you can get, and it’s completely free. Just make sure the window is in front of you, not behind you.
6. My video looks "grainy" even though I have good lights. Why?
This is usually due to ISO settings. When a camera doesn't have enough light, it artificially "boosts" the signal, which creates digital noise (grain). To fix this, you need to increase the physical light in the room rather than turning up the ISO on your camera. Aim to keep your ISO as low as possible (usually around 100 to 400) for the cleanest image.
What's Your Reaction?