Why I Needed to Fix Noisy Images the Right Way
Discover how AI noise reduction can transform your images. Learn step by step techniques, real life examples, and expert tips to clean up noisy photos efficiently and professionally.

Main Highlights Regarding AI Noise Reduction in Images
Learn why image noise occurs and how it affects photo quality
Understand AI powered noise reduction vs traditional methods
Step by step practical workflow using real software
Avoid common mistakes I made on my first attempts
Pro tips for maintaining clarity while reducing noise
Why I Needed to Fix Noisy Images the Right Way
I remember the first time I took photos in low light using my DSLR. I was excited to capture the city skyline at night, but when I looked at the images later, I saw this grainy texture everywhere. My sharp city lights were buried under noise, and I was frustrated. I tried manually adjusting brightness and contrast, but it barely helped. That’s when I discovered AI noise reduction tools, and my workflow completely changed.
Noise is simply random variations of brightness or color that make images look grainy. It’s most visible in low light photos, high ISO settings, or long exposures. Traditional noise reduction methods often soften the image too much, losing fine details. AI powered solutions, however, intelligently distinguish noise from real detail, producing cleaner and sharper images.
Materials I Use
Before diving into AI noise reduction, I gather a few tools to make the process smooth:
Software: Top AI noise reduction tools like Topaz DeNoise AI, Adobe Lightroom with AI powered features, and DxO PhotoLab
Computer: A system with at least 16GB RAM and a modern GPU for faster processing
Original Images: RAW files whenever possible for maximum flexibility
Calibration Tools (Optional): Monitor calibration tools for accurate color
Backup Storage: External drive to keep original files safe
These tools allow me to work efficiently and prevent irreversible mistakes.
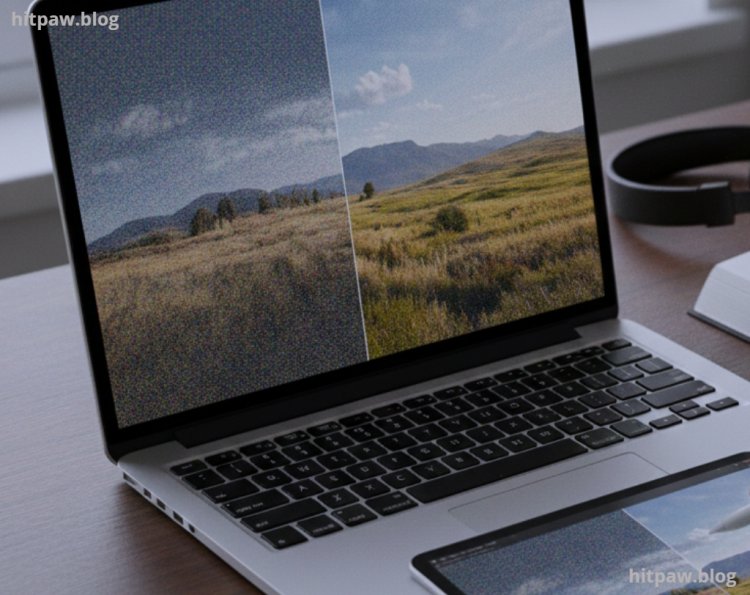
Step 1: Understanding AI Noise Reduction vs Traditional Methods
I first experimented with traditional noise reduction, adjusting sliders for luminance, color noise, and sharpness. While it reduced some noise, it also blurred textures like hair, leaves, and fabric.
AI noise reduction uses machine learning models trained on millions of images. It predicts what’s noise and what’s real detail, applying selective adjustments. For example:
Grainy sky > smoothed intelligently
Leaves on a tree > preserved edge details
This approach felt revolutionary when I compared before and after results from my first cityscape shoot. AI reduced noise without sacrificing sharpness a problem that haunted me with manual methods.
Step 2: Preparing Images
Preparation is key. Before applying AI noise reduction, I:
Shoot in RAW: RAW images have more data and respond better to AI processing
Check exposure: Correct underexposed images first; AI noise reduction works better on balanced tones
Backup originals: Always keep a copy in case I want to try different settings
Skipping these steps caused me frustration early on. I once applied noise reduction to an overexposed JPEG and ended up with blotchy patches I couldn’t fix.
Step 3: Using AI Noise Reduction Software
Here’s my step by step workflow using Topaz DeNoise AI (my preferred tool):
Open the image: in DeNoise AI
Select the AI model: Options often include Standard, Clear, Low Light, or Severe Noise
Adjust strength sliders: I usually start around 50 to 60% and preview in full resolution
Compare before/after: Always toggle to ensure details like eyes, hair, and textures remain intact
Export image: I save a separate copy in TIFF or high quality JPEG
Pro Tip: Avoid maxing out sliders. Over processing can create unnatural textures or a “plastic” look.
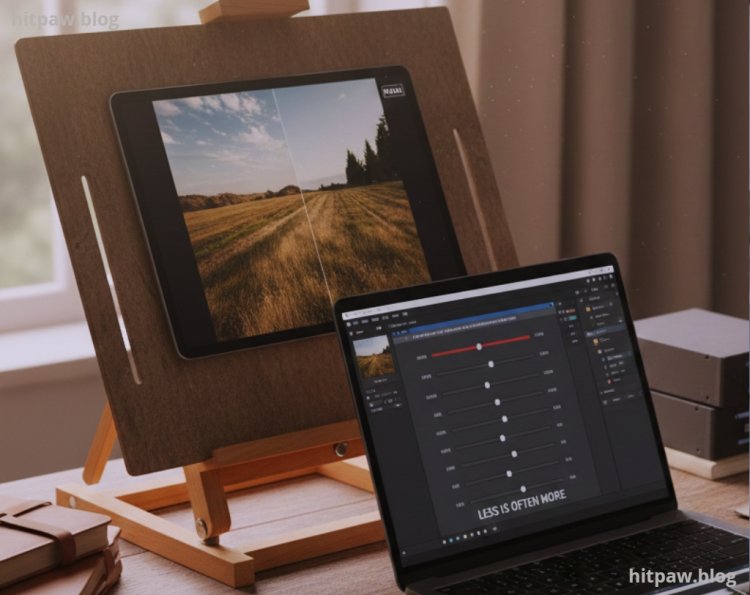
Step 4: Combining AI Noise Reduction with Other Enhancements
AI noise reduction works best when combined with other adjustments:
Exposure correction: Brighten shadows before reducing noise
Sharpening: Subtle sharpening after denoising can restore crispness
Color adjustments: Balance saturation and contrast after noise reduction
In my first workflow, I tried to reduce noise and sharpen simultaneously. The result? Over sharpened edges and artifacts. I learned to separate each step for cleaner results.
Step 5: What I Got Wrong the First Time
On my first try:
I applied AI noise reduction directly to JPEGs
Over processed images using maximum slider settings
Ignored calibration; colors looked weird after denoising
How I fixed it:
Switched to RAW files
Used moderate noise reduction settings
Calibrated my monitor for accurate colors
Processed images in stages noise reduction first, then exposure and sharpening
After these adjustments, my images looked natural yet crisp, even in low light conditions.
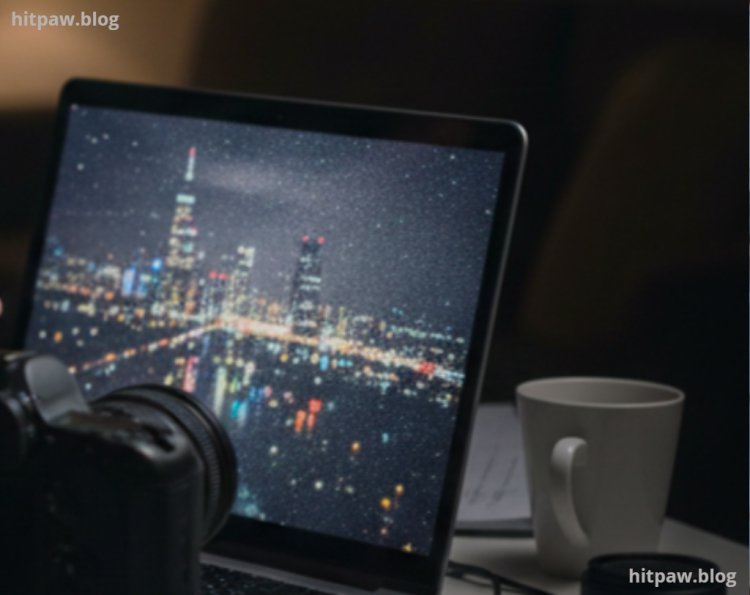
Step 6: Practical Examples
Example 1: Night Photography
Original: ISO 6400, visible grain in sky and streets
AI denoise: Noise reduced, street lights clear, clouds preserved
Adjustment: Slight exposure and sharpening > final image looks professional
Example 2: Indoor Portraits
Original: Soft, grainy skin textures under tungsten light
AI denoise: Smoothened skin subtly, hair strands preserved
Result: Natural look without plastic smoothing
Example 3: Landscape Photography
Original: Dusk shots with long exposure
AI denoise: Maintained tree and water textures
Enhancement: Minor contrast boost > vibrant, noise free landscape
These examples reflect the difference between trial and error and a consistent workflow.
Step 7: Step by Step Guide Summary
Here’s a checklist I follow for each image:
Backup RAW files
Correct exposure, white balance, and color
Open AI noise reduction software
Select the appropriate AI model
Adjust noise reduction sliders moderately
Preview in full resolution
Apply sharpening or contrast adjustments if needed
Export a separate copy for final use
Review on calibrated monitor
Finally
AI noise reduction can transform your photography, but it’s not magic. It’s a tool that requires preparation, careful adjustment, and workflow discipline.
Some key takeaways from my experience:
Always start with RAW files for flexibility
Avoid maximum sliders less is often more
Combine noise reduction with other edits for natural results
Backup originals and keep a structured workflow
Test different AI models for your scene one size doesn’t fit all
Following these steps consistently will save hours of frustration and elevate the quality of your images.
FAQs
1. Can AI noise reduction damage image details?
Yes, over processing can create unnatural textures. Always preview and adjust sliders moderately.
2. Is AI noise reduction better than traditional methods?
AI models typically preserve details better while reducing noise, especially in low light or high ISO shots.
3. Can I apply AI noise reduction to JPEGs?
Yes, but results are better on RAW images with more data.
4. Do I need a high end GPU for AI noise reduction?
Not strictly, but a GPU significantly speeds up processing, especially for high resolution images.
5. Should I combine noise reduction with sharpening?
Yes, but always apply sharpening after denoising to avoid emphasizing noise.
6. Are AI noise reduction tools safe for professional workflow?
Absolutely. With proper settings and workflow, they’re industry standard for photographers and editors.
What's Your Reaction?